
Wood Carving for Beginners: A Comprehensive Guide to Getting Started
Wood carving is a rewarding and creative hobby that allows individuals to transform a piece of wood into a work of art. While it may seem daunting at first, with the right tools, techniques, and guidance, beginners can quickly learn the basics of wood carving and create beautiful pieces. In this comprehensive guide, we’ll explore the fundamentals of wood carving for beginners, including the tools and materials needed, basic techniques, safety tips, and project ideas to help you get started on your wood carving journey.
Getting Started with Wood Carving
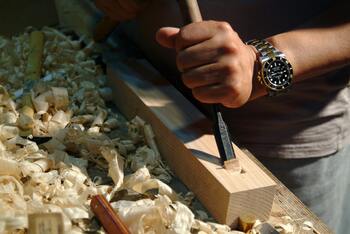
1. Tools and Materials
- The first step in wood carving is to gather the necessary tools and materials. Essential tools for beginners include:
- A carving knife: Used for shaping and detailing wood.
- A gouge: A curved chisel used for carving concave shapes.
- A chisel: A flat-bladed tool used for carving flat surfaces and edges.
- Choose a softwood such as pine or basswood for your first carving projects, as they are easier to carve and less expensive than hardwoods.
2. Basic Techniques
- Chip carving: A technique that involves removing small chips of wood to create intricate designs. Start by drawing your design on the wood and then use a carving knife to remove the wood around the design.
- Relief carving: A technique that involves carving away the background of a design to create a raised image. Use a gouge or chisel to carve away the background while leaving the design raised.
3. Safety Tips
- Always wear safety goggles and a dust mask when carving to protect your eyes and lungs from wood dust.
- Keep your carving tools sharp to prevent slipping and cutting yourself.
- Use a carving glove to protect your hand while carving.
Beginner Wood Carving Projects
1. Whittling a Simple Figure
- Start with a small piece of softwood and use a carving knife to whittle away the wood to create a simple figure, such as a bird or animal.
2. Carving a Spoon
- Carving a spoon is a great project for beginners to practice shaping and detailing wood. Use a gouge and a carving knife to carve a spoon from a piece of hardwood.
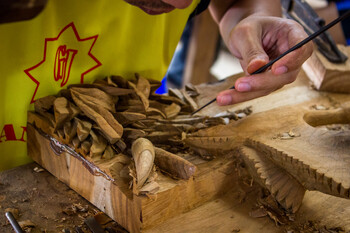
3. Creating a Relief Carving
- Try your hand at relief carving by carving a simple design, such as a flower or leaf, into a piece of softwood. Use a gouge or chisel to carve away the background and leave the design raised.
Advanced Wood Carving Techniques
1. Power Carving
- Power carving involves using power tools, such as rotary tools or power carvers, to carve wood. This technique allows for faster and more precise carving, but it requires practice and proper safety precautions.
2. Detailed Relief Carving
- Once you’re comfortable with relief carving, you can try your hand at more detailed designs, such as portraits or landscapes. Use a combination of gouges and chisels to create depth and detail in your carvings.
3. Wood Burning
- Wood burning or pyrography, is a technique that involves using a heated tool to burn designs into wood. This technique can be used to add intricate details to your carvings and enhance their overall appearance.
Conclusion
Wood carving is a versatile and enjoyable hobby that can be enjoyed by people of all ages and skill levels. Whether you’re a beginner looking to try your hand at a new craft or an experienced carver looking to refine your skills, wood carving offers endless opportunities for creativity and expression. By following the tips and techniques outlined in this guide, you can start your wood carving journey with confidence and create beautiful pieces that you can be proud of.